Removing the Electrical heaters.
July 27thand October 8th to XXth
Click image for enlargement.

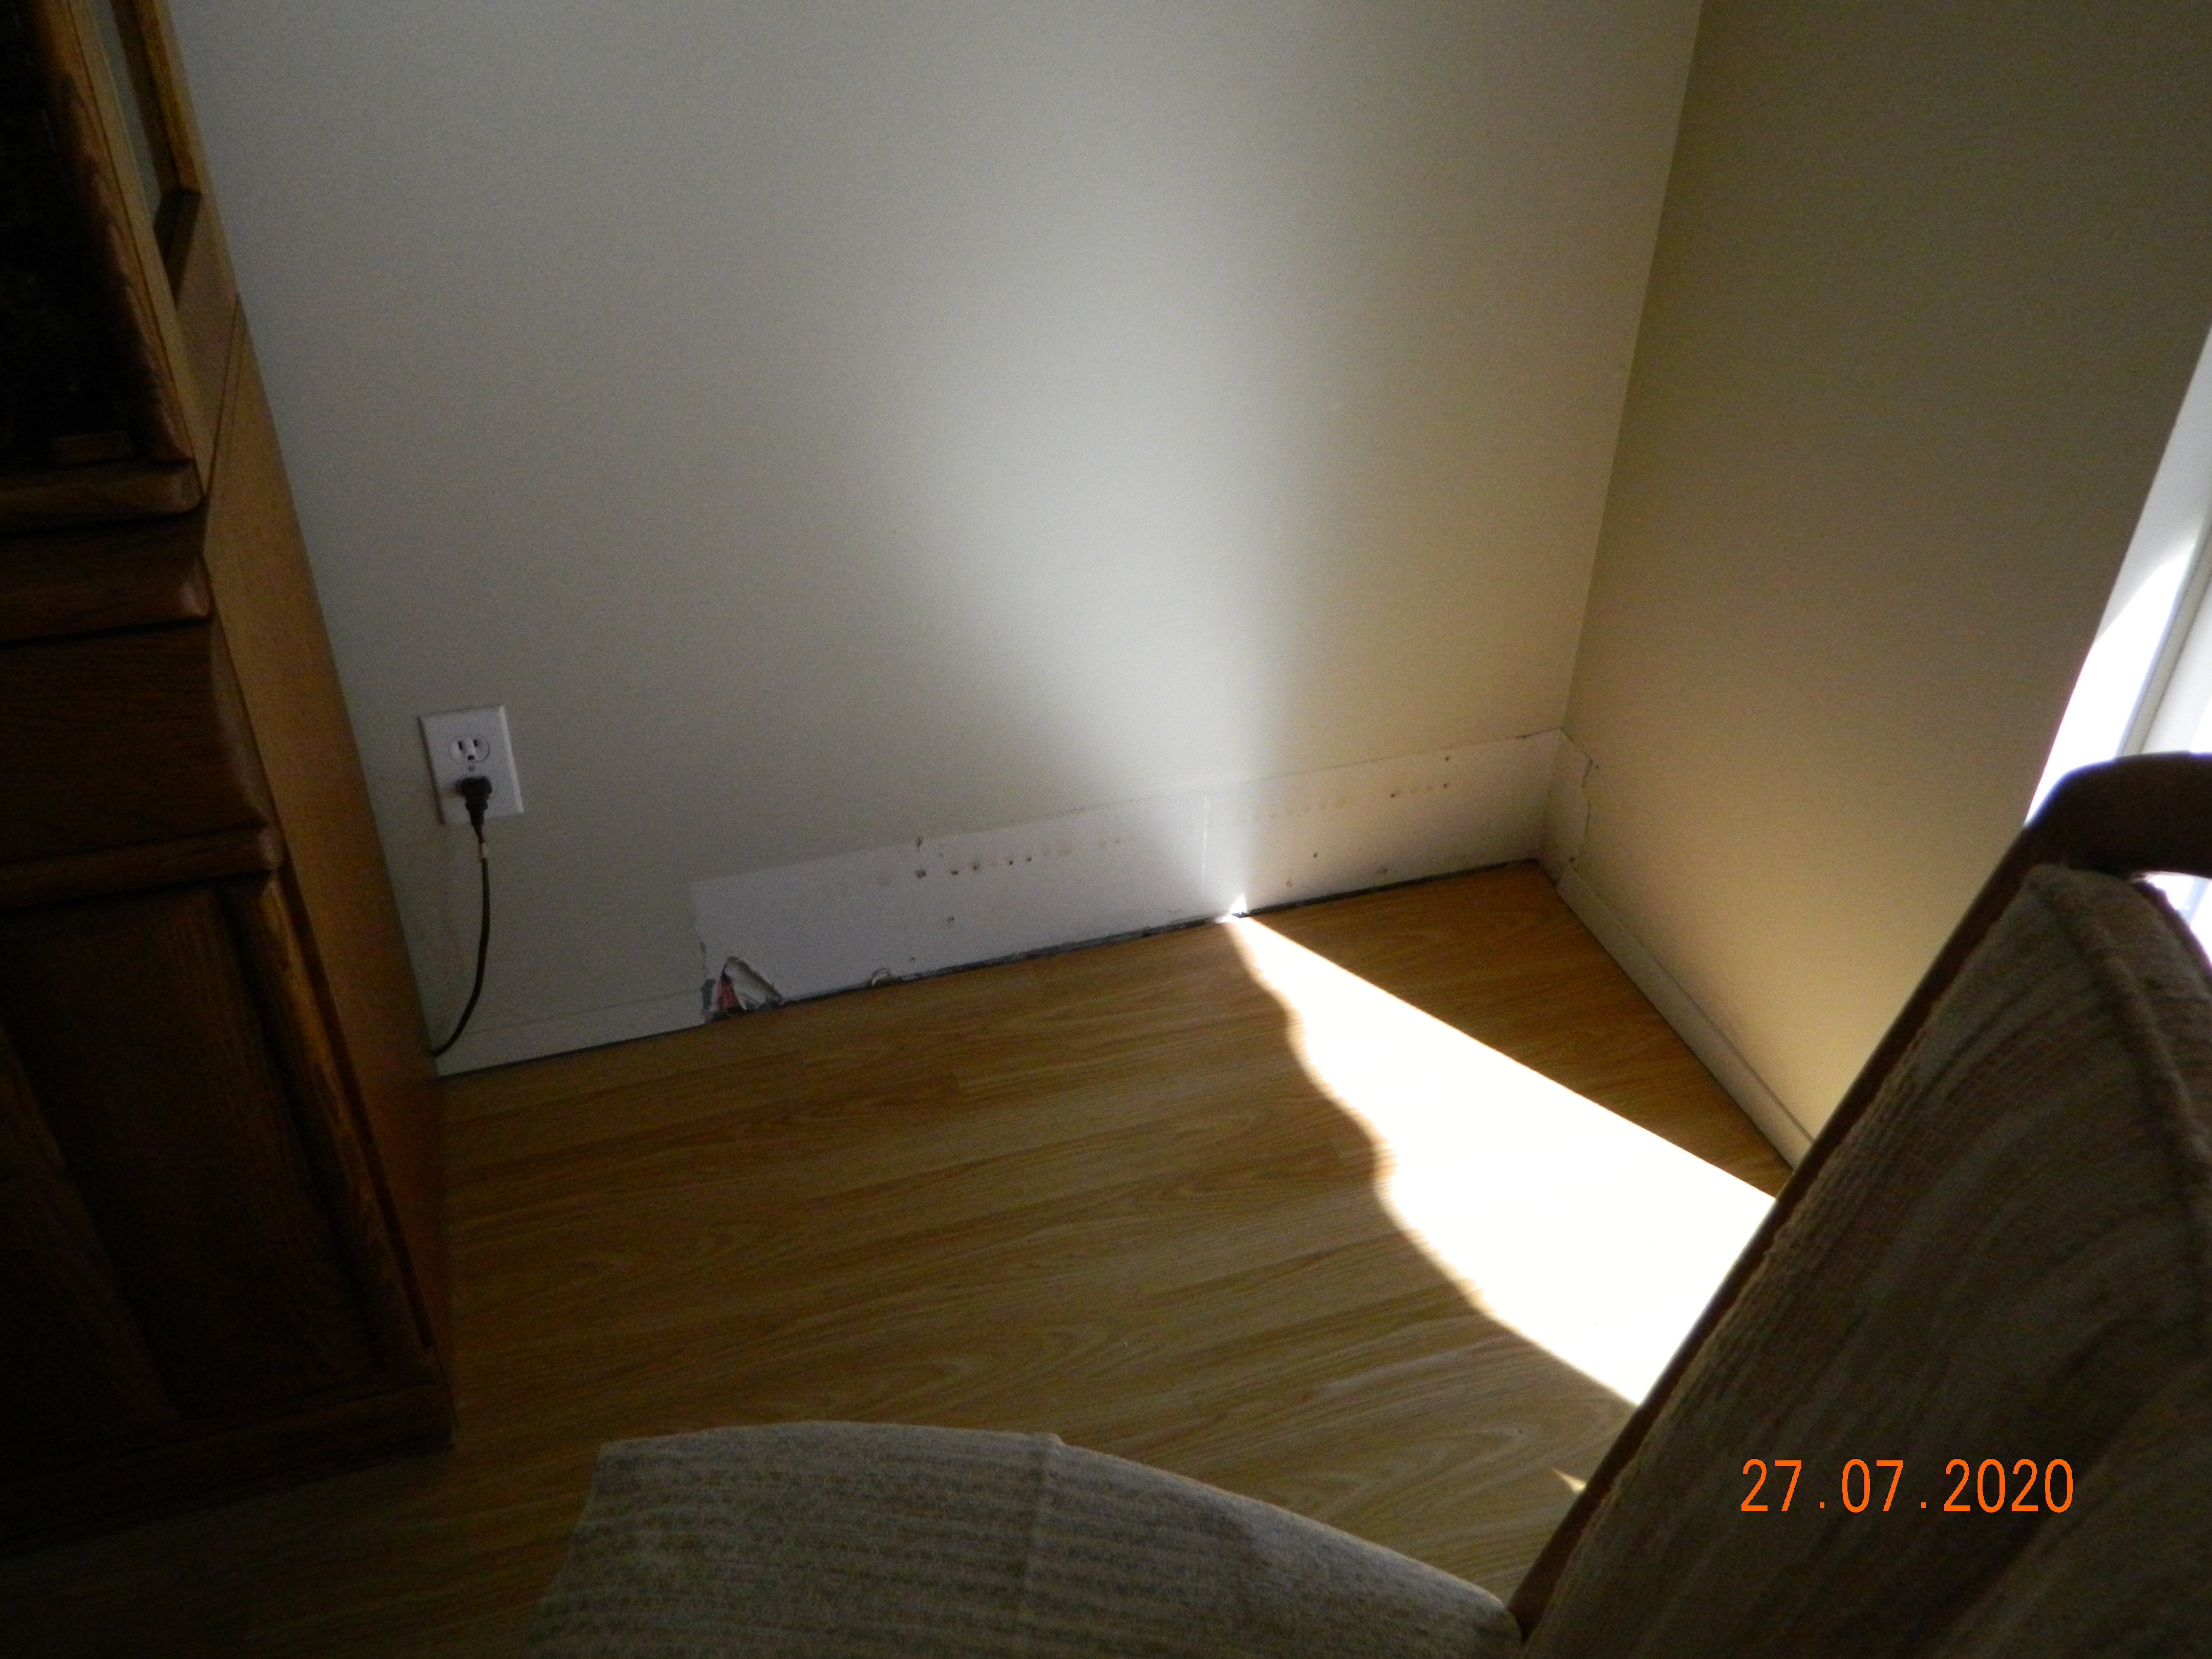
After the removal of the thermostat electrical boxes was well under way, I started on removing the actual heaters. This is the one from the spare bedroom.
(27:07:2020)
(27:07:2020)
(27:07:2020)
This is the master bedroom, the holes filled, and painted. Colour doesn't match well and the carpet does not go up to the wall underneath where the heater was. The paint colour was sampled 7 years ago when we moved it, based on a Home Depot machine at that time.
(08:10:2020)
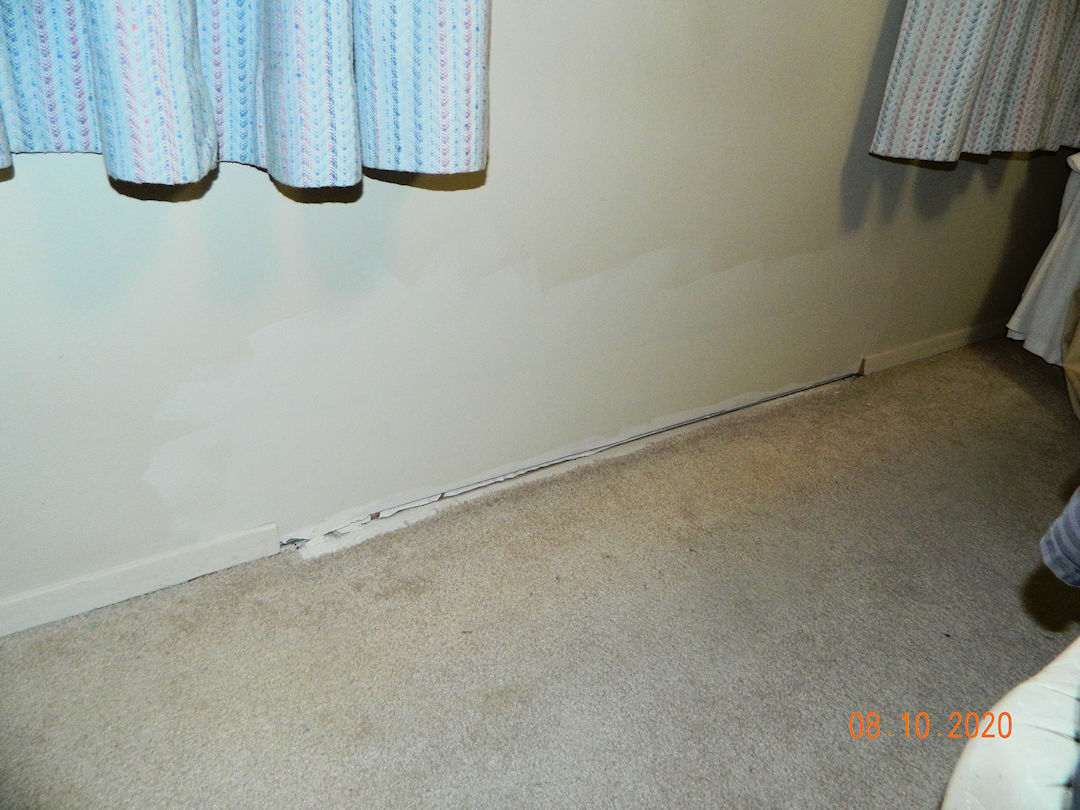
(08:10:2020)
(08:10:2020)

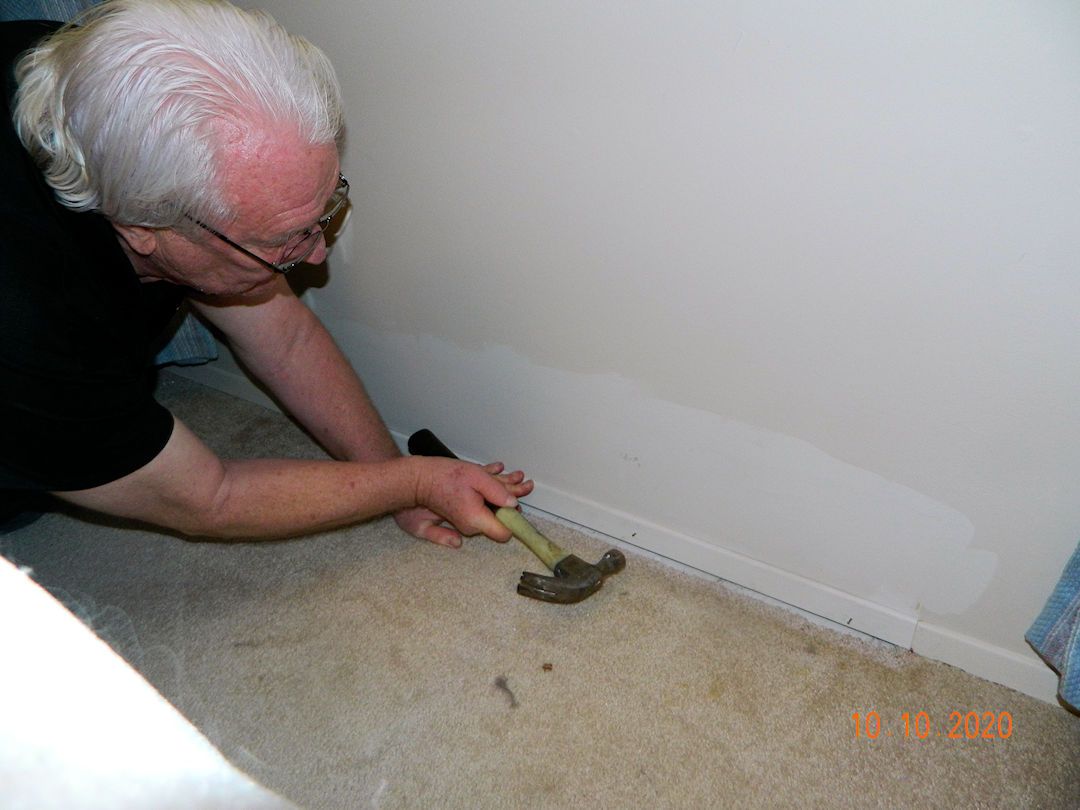
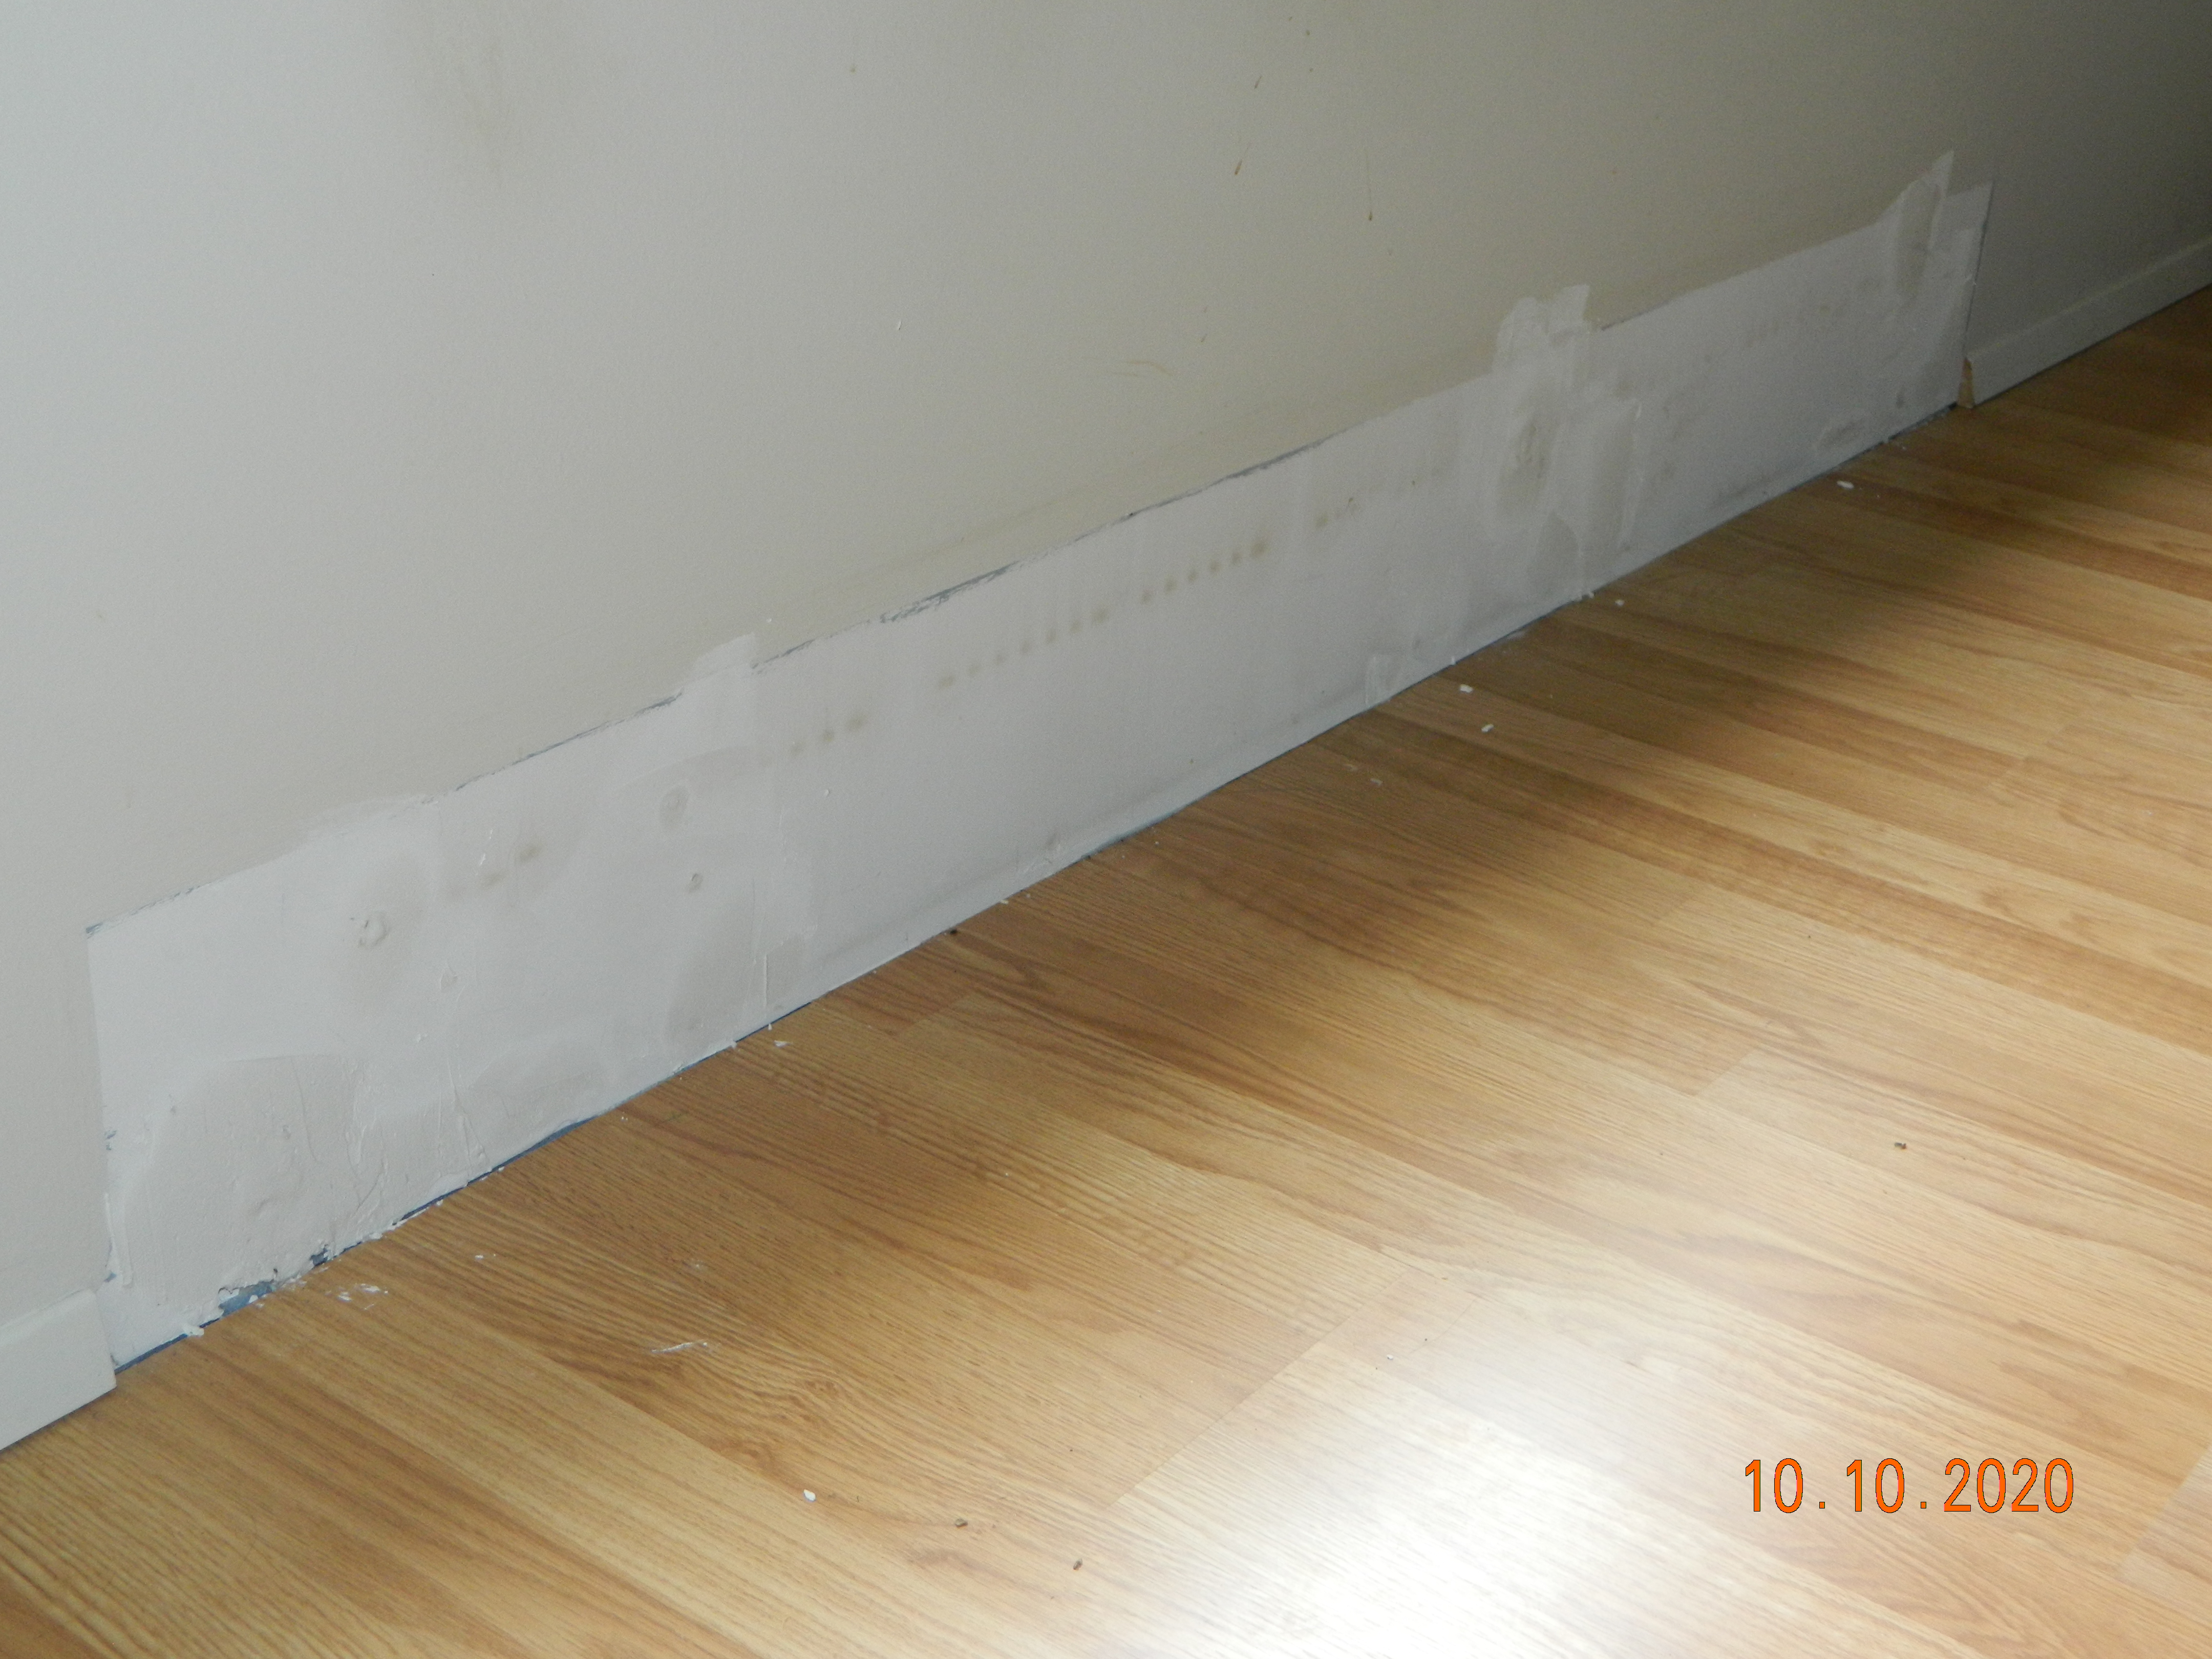
Note the hammer! I do not remember the last time I drove a nail, any nail, in anything. The air compressor is just too heavy for me to truck it up and down the stairs these days. There is a strip of the carpet missing, where the installers didn't push it right back to the wall under neath the heater..
(10:10:2020)
| Click the Home button below to return to the main button menu. |

|